


The Colonial Home Guide to Heat Pumps
At long last, our design notes on the most common type of single family home in Laminar Collective, and quote possibly in all of Massachusetts.

A Guide by Laminar Collective. We want to thank the Barr Foundation, via. Building Electrification Accelerator, and our members for making a lot of this possible! And Ace as well.
This is it. This covers like, 50% of the homes that sign up for LC.
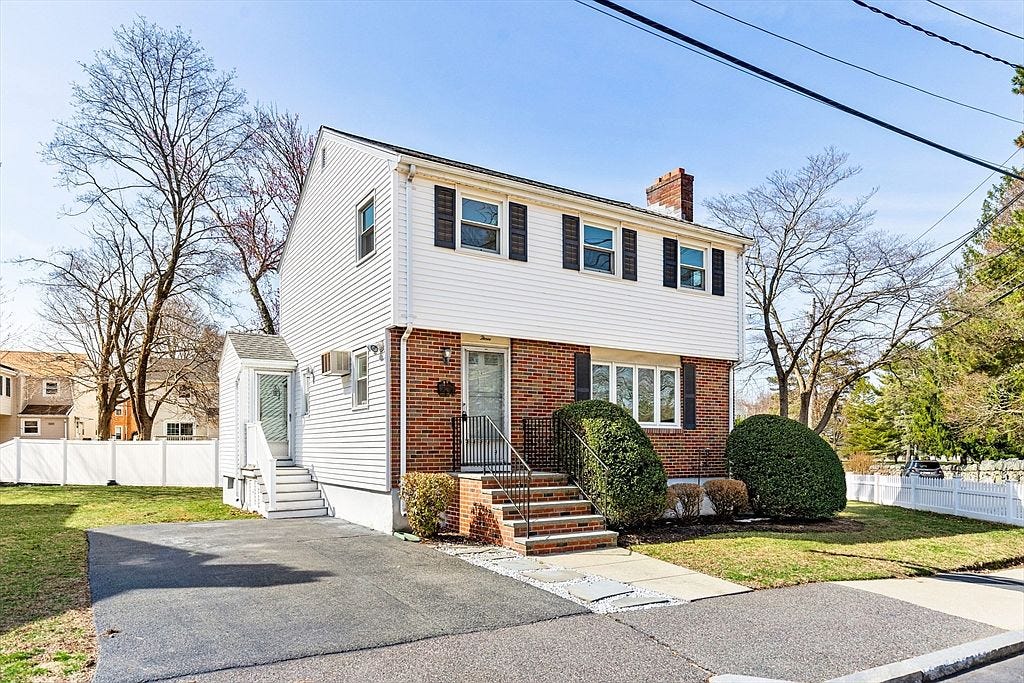
We all know it. We all love it. This boxy, distinctly New England home design is perhaps the most common single family home architecture in the state.
Every single HVAC contractor has probably done an installation in one of these.
Today, we are going to show you exactly how it’s done, and how much it costs.
The Summary
A single family colonial is probably the most sought-after home for HVAC contractors in the state, because from a design and installation standpoint, it’s one of the easiest to work with.

The most common installation setup we see is a mixed system, with a ducted air handler conditioning the 2nd floor bedrooms, and mini-splits covering the 1st floor (& occasionally basement).
Here are the easy parts:
Typically, a BIG unfinished attic space with standing room. You can run ducts.
Super standardized layouts - bedrooms on top, open living room & kitchen on 1st.
Plenty of space around the house to mount condensers & do work.
Typically will have flat walls on the side, which makes it easy to run line set.
Located in suburbs, so less traffic to worry about, and easy parking.
Here are the hard parts:
A fair amount will already have pre-existing ductwork, which means that you’ll have to assess whether a heat pump is compatible with that ductwork.
Finished attic & basement (but mostly finished attic) will add to difficulty.
New ductwork is easier to design, but nonetheless, still more difficult to install than mini-splits.

Single family homes typically are bigger than units in a triple decker, so the overall job is bigger and contractors love that.
Standard Layouts
These homes typically have a big attic, 2 floors, and a basement:
Attic: typically unfinished, sometimes with pre-existing ductwork
2nd Floor: bedrooms, usually 2 or 3, and a bathroom
1st Floor: living room, dining room, kitchen, with a relatively open floor plan
Basement: either unfinished, or finished with a utility room for the heating & electrical
Here’s a sample floor plan:
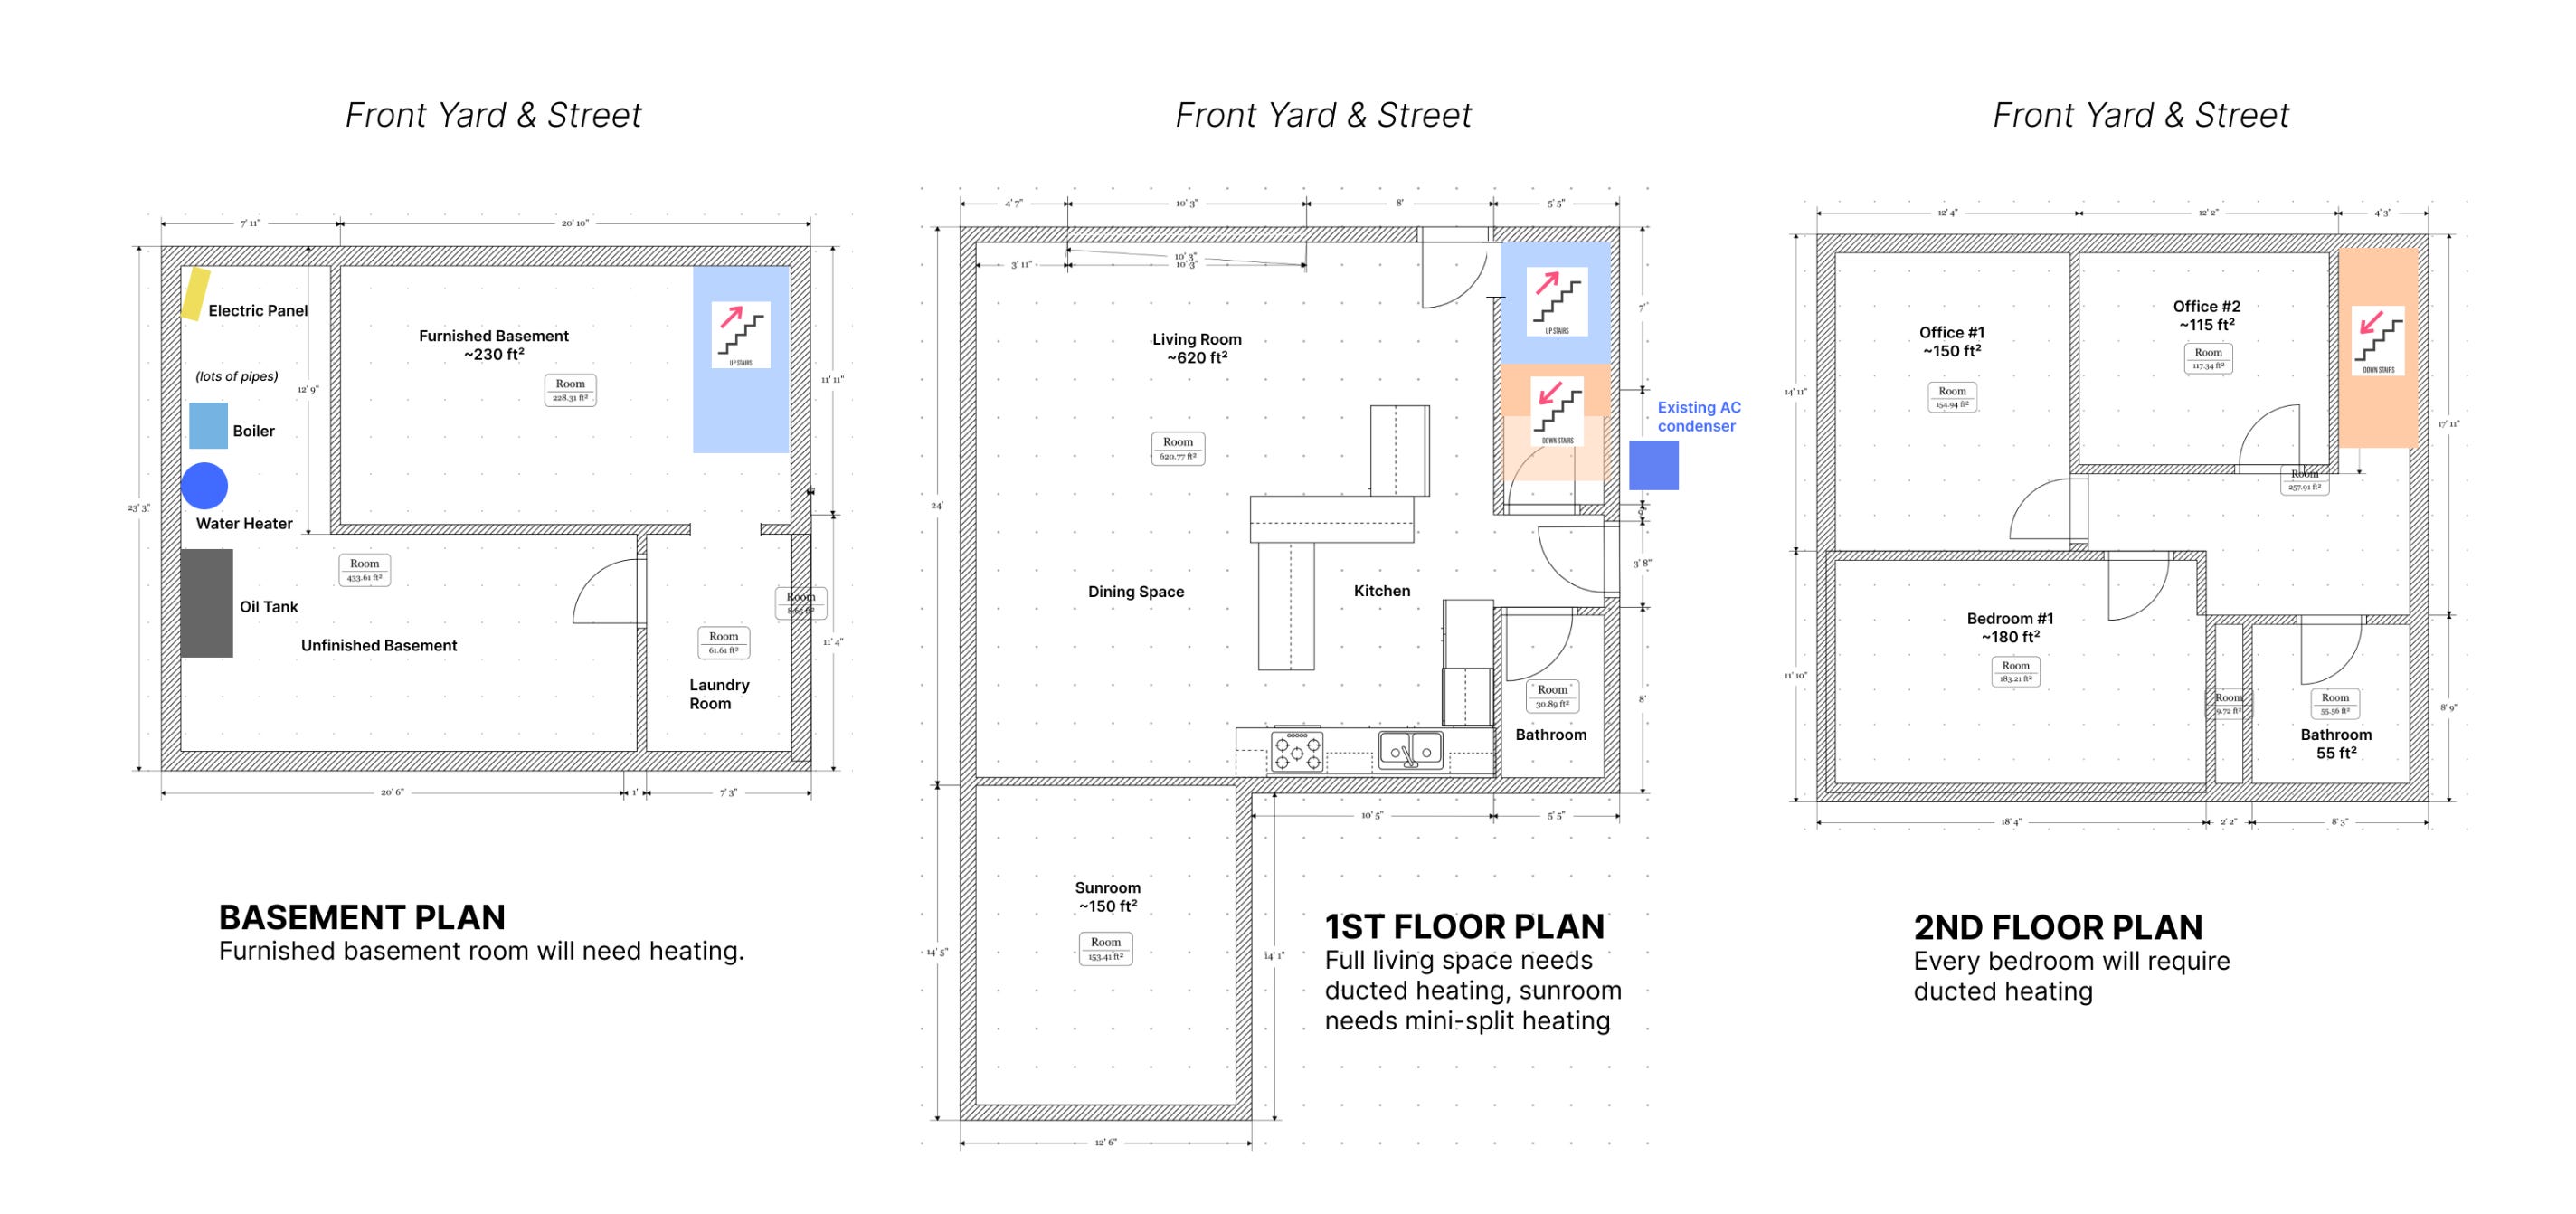
It’s important to note that this attic typically will have easy access from the ground, because only 2 sides are sloped. This is different than the attic in a 2-family home, which are more difficult to access.
Design Considerations
I’m going to first talk about homes without existing ductwork, then homes with existing ductwork.
Should I Duct the Rooms Upstairs?
So the primary design decision to make for a home like this is whether you want to install ductwork for the upstairs bedrooms.


Let’s lay out the options:
Ductless upstairs: better performance, since you don’t lose heat in the ductwork in unconditioned space. This also means a cooler discharge temperature in summer, and warmer in winter. Plus, you get more space so you can finish your attic if you’d like. More on this in the article below.
Ducted upstairs: no wall units, so you get more wall space. You get a bit more air mixing because air cycles through the return & gets redistributed through each room. You can condition the bathroom if you want. However, you lose some attic space and you lose heat in ductwork, which means it’ll be tough to cool to 70 degrees in a heat wave. Plus, you’re more likely to get ice dams along the edge of the roof!

Typically, installing ductwork is the more expensive option, since it has the high upfront cost of an air handler + supply/return trunks. But each additional room has a low marginal cost, since it’s just a matter of connecting a branch to each room:

For this reason, a lot of contractors will offer to duct the 2nd floor as an option1. Of course, that only makes sense if you’re not planning to finish your attic.
Plans to Finish Attic

Finishing your attic? Here’s how that plays out:
Ducted: you’ll need to find a knee wall space with access for an air handler, and supply/return trunks; branches either go in knee wall or underneath floorboards.
Ductless: a lot easier, won’t really use attic space. Ceiling cassettes also an option.
This is a lot easier to do when the walls are open during like, a gut renovation. Ducted is not really an option if you already have a finished attic space.
Can I Duct the Basement?
It’s possible. Usually if it’s unfinished. And the ceiling needs to be open, flat, and easy to run ductwork across (e.g. not obstructed by a bunch of pipes already).


Please be aware that it’s far easier for things to drip/fall down the registers than for things to fall up into ductwork in the attic. Placing wet shoes over a return register next to the door, for example, will result in rusted sheet metal or degraded ductwork over the long-run.
Full article here:

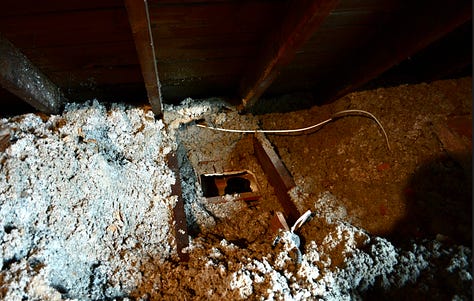
Pre-existing Ductwork
For homes with preexisting ductwork in the attic, you’d need to figure out if there are leaks and if the airflow to the 2nd floor bedroom is sufficient to heat & cool the space. Full article here:

Chances are, the smaller your rooms/bigger your existing ductwork, the better. Ductwork that is too narrow for an air handler that needs to push a lot of air to condition huge rooms will make the fan work harder, potentially leading to premature motor burnout.
Exterior Line Runs
Typically, one side of the house will have an unobstructed wall where you can run a refrigerant line straight up to the attic air handler. This makes life a lot easier, vs. homes with Victorian features where you need to find your way around soffits.
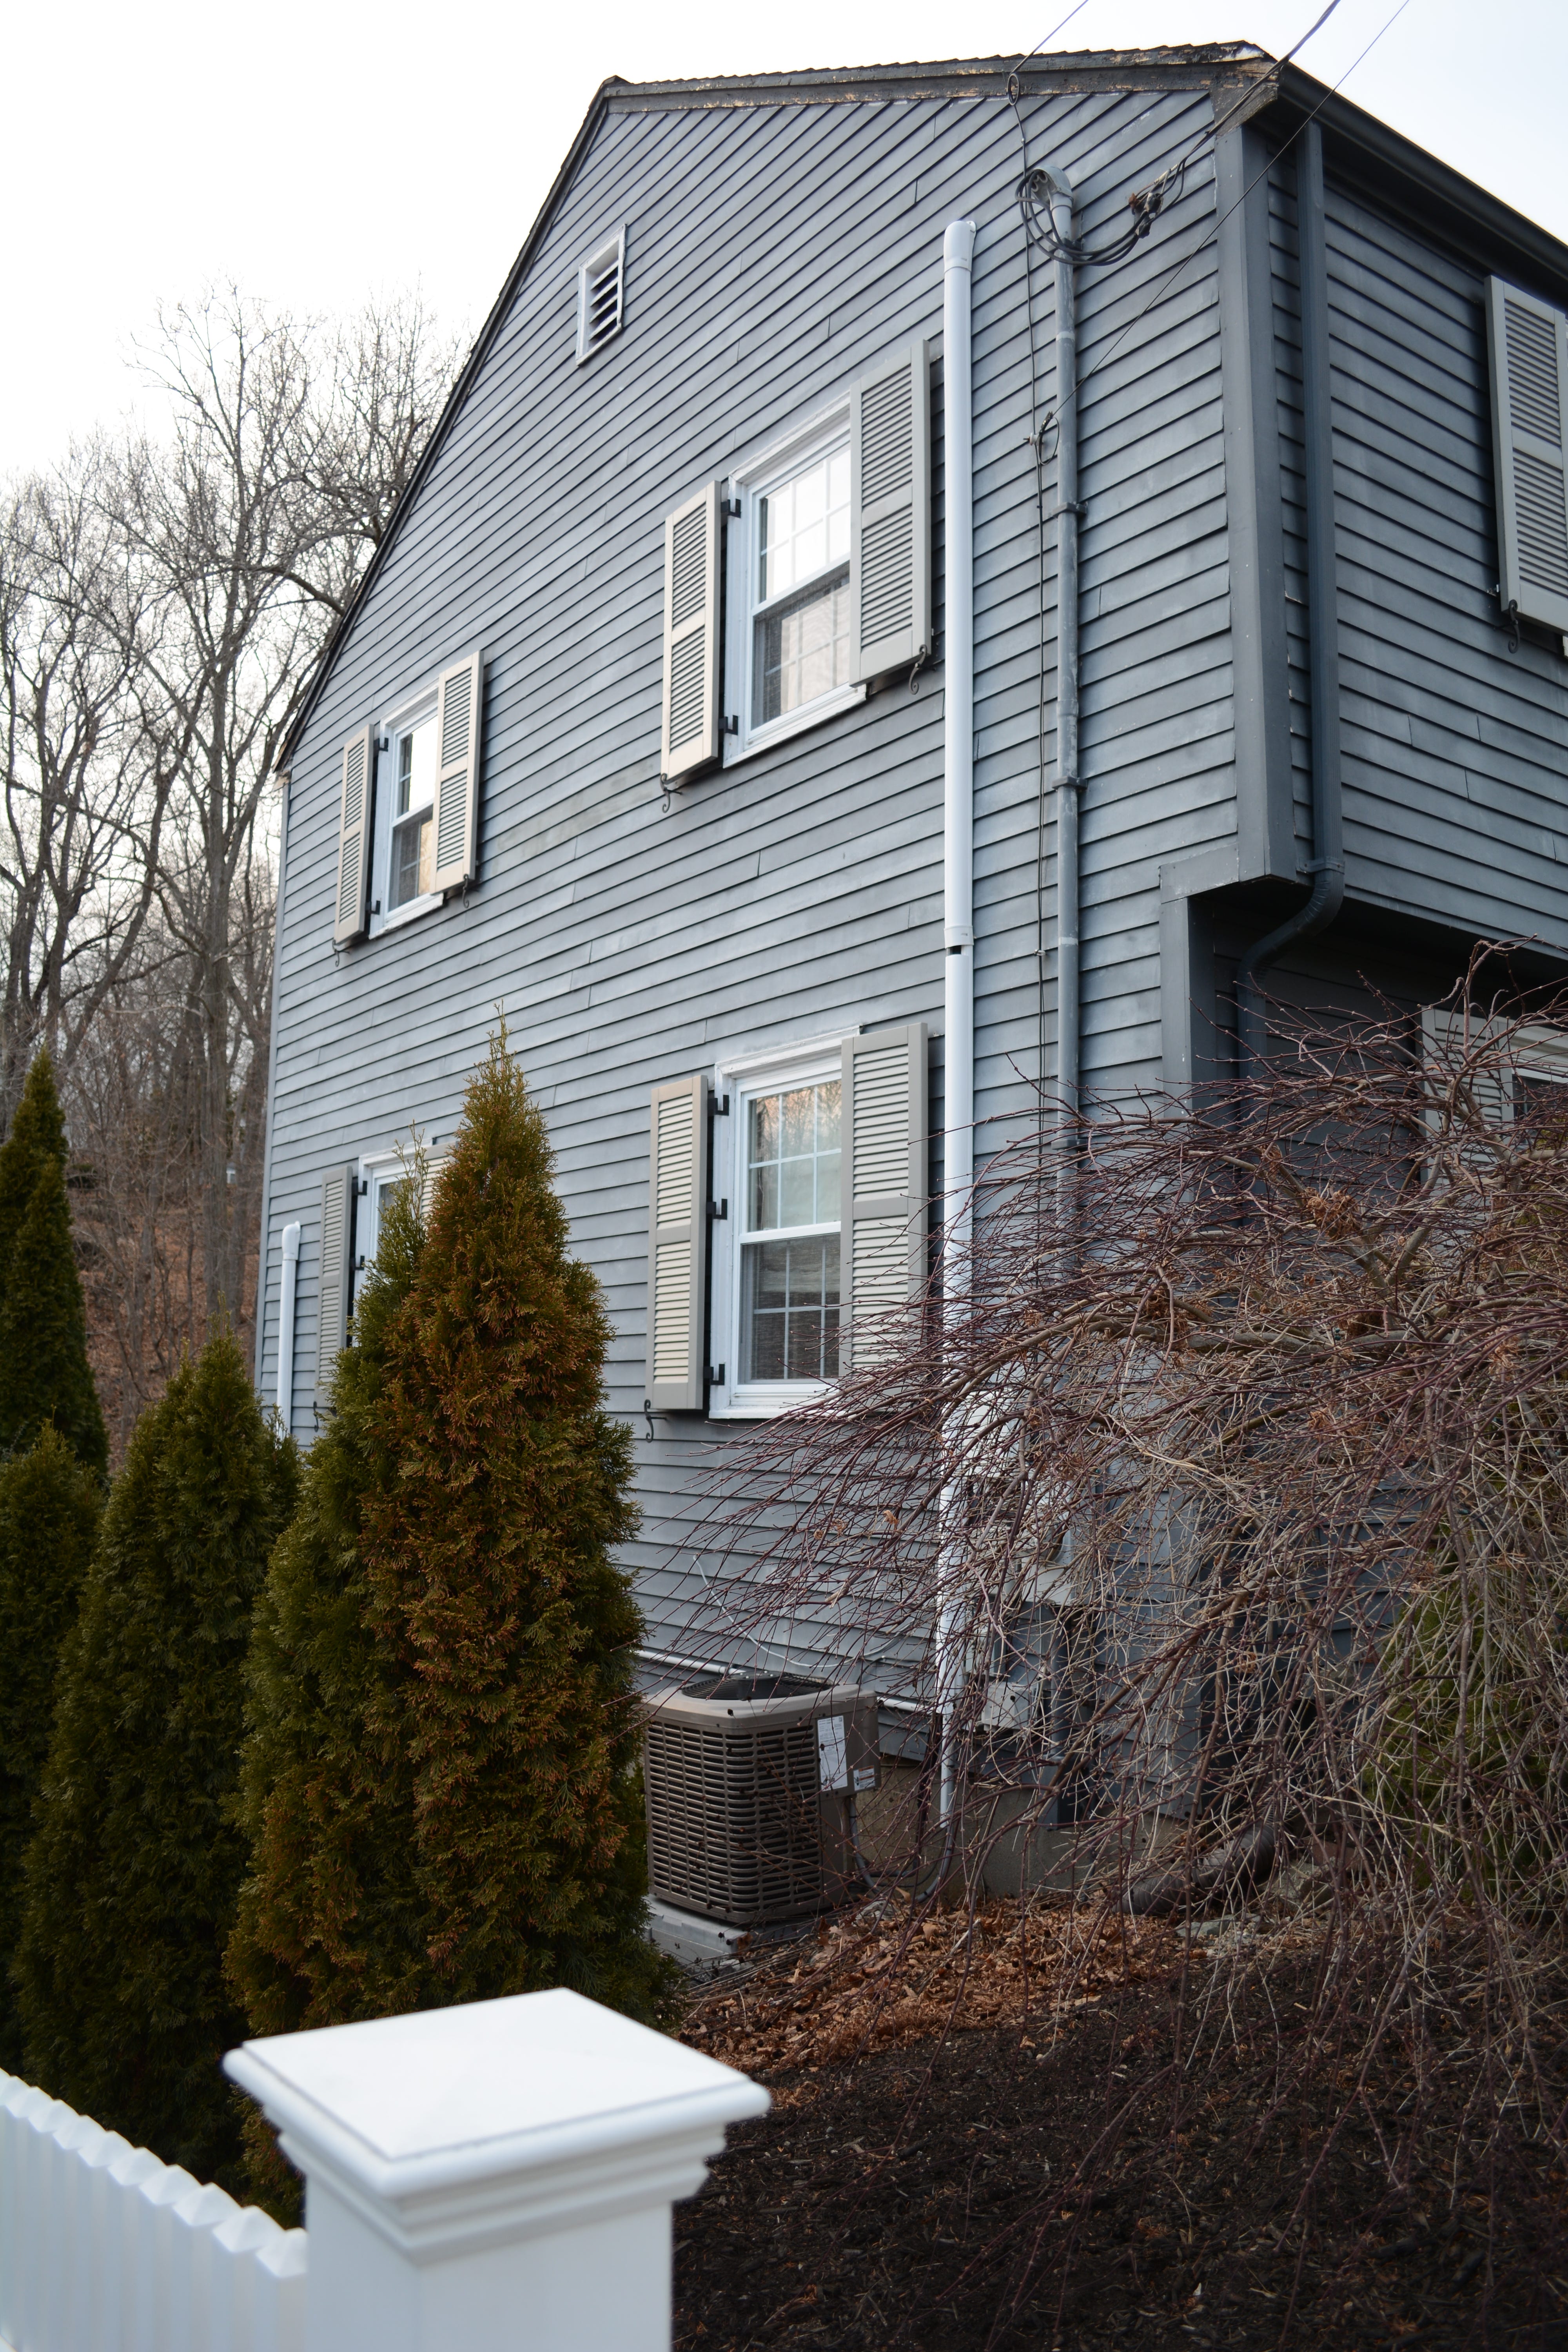
As a result, exterior line set is typically fairly minimal.
Sizing & Equipment Selection
There are 2 goals to sizing & equipment selection: size appropriately for the bedrooms, and size appropriately for the house.
For the Bedrooms


Consider the typical Manual J heating & cooling load of upstairs bedrooms. They’re anywhere between ~3,000 BTU (small bedroom) to ~6,000 BTU (large master bedrooms). Heat rises through the house, and with Mass Save weatherization done, you’re not losing a ton of heat through the attic.
These are smaller spaces.
Let’s consider a ducted upstairs system first.
Which means that you can totally just use a ~1 to 1.5 ton medium-static ducted system, like a Daikin FDMQ or a Mitsubishi PEAD unit, which take up less space. Good for smaller colonials.


You could use the full-sized air handlers as well, but my word of warning here is to resist oversizing, since they can reach higher capacities like 3 ton. But the smaller capacity ones are fine, so long as they are in line with your heat load calc.

Now, let’s consider mini-splits.
Mini-splits will be more than enough for most bedrooms.
The smallest you can go is ~6,000 BTU each.
Having 3 of them would give you 18,000 BTU total capacity, which is fine.
You don’t really need more than that.
You can go up to 9k if you want, since they are capable of ramping down.

But to ramp down, you’ll need a condenser that isn’t oversized for the entire house.
For the Entire Home
We see heating loads ranging from 2.5 tons to 4 tons, depending on whether people have finished their basements or not. Finished basements, obviously, will add to the heating load.
If you have a large (2,500 sq ft+) house, oversizing is less of a problem. You’ll still want to check the Manual J, but you won’t run into situations where the minimum capacity is too high.
If you have a medium-sized house (2,000 to 2,500), you’ll want to consider sizing as a matter of performance during the shoulder season, when you only need a fraction of the heat load.
If you have a small house (1,800 & below), you need to pay attention to ensure that you don’t oversize & end up with inefficiencies.
Let me give you an example of oversizing issues.
Let’s say you’re doing a ductless mini-split only installation. If you have 3 heads for the bedroom, and 2 downstairs, you’ll need a 5-port outdoor condenser unit, such as this one:

The minimum capacity of the R-410a model on this is ~25,000 BTU. It would render your system oversized, and you may experience performance issues during shoulder seasons.
Solutions
2 Condensers: if you go with 2 condensers, it’ll add to the cost but you can always turn off one condenser.
Good Turndown: some models will have really low minimum heating outputs. This includes a lot of the next generation R-32 & R-454B models. See below.

For us, typically in smaller homes we opt for brands such as Daikin, while in larger homes, Mitsubishi is on the table.
Installation Process
For the sake of simplicity, this describes the install process for a mixed system. If we’re doing an all-ductless system, the steps will be very similar to the installation process for a triple decker ductless system.
Also feel free to reference this article below for a larger ductless install of 7 indoor units.

It takes anywhere from 3 to 5 days to install a mixed ducted 2nd floor + ductless 1st floor heat pump system for a standard-sized2 colonial SFH with no pre-existing ductwork, if you’re working with a crew of 3 people.
Here’s how it’s done.
Initial technical walkthrough - typically happens in advance of installation kickoff. This is more important than mini-split installations, because the lead tech needs to decide which ductwork components to bring to the job. Ducted jobs call for a MUCH greater variety of potential components than mini-splits, which are pretty standardized.
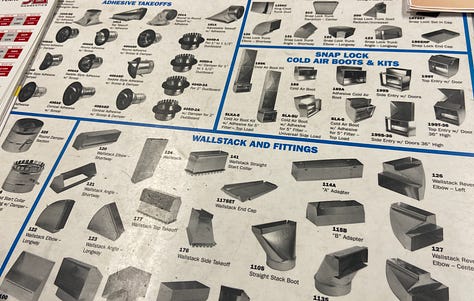


Usually, the lead tech will create a list of items needed for this particular design, then bring those things on-site. This also needs to be done to fabricate the plenum & trunk for the air handler. They’ll also confirm, with the homeowner, where the supply registers & return grill should be. Arrival, equipment delivery & cutting registers - once the crew arrives, they bring all the material (including the air handler) up to the attic and start cutting supply registers. They’ll also start prepping ductwork, which involves insulating trunks & branches.


Mounting indoor units up on wall / drilling exterior holes, incl. basement. - this part is similar to a standard mini-split installation, and can take place concurrently with the ductwork in the attic if there’s another installation tech available. I’ve seen a lot of branch boxes mounted in the basement here.


Connect line runs and wire air handler & mini-splits - suspend the air handler, if that’s your thing (makes it easier to service). Flare & connect the refrigerant lines to the air handler & mini-split, and to the branch box if you have one (but not the outdoor unit/condenser just yet) and connect the electrical wiring, which you are also running along with the refrigerant lines. Do the same for condensate lines.


Connect ductwork & add line cover - once the supply & return registers are set, connect the main trunk to the branches via. takeoffs, the branches to the supply registers (if not already). Set up an extra condensate drain pan if you’d like. Add line cover to hide the refrigerant & condensate lines.


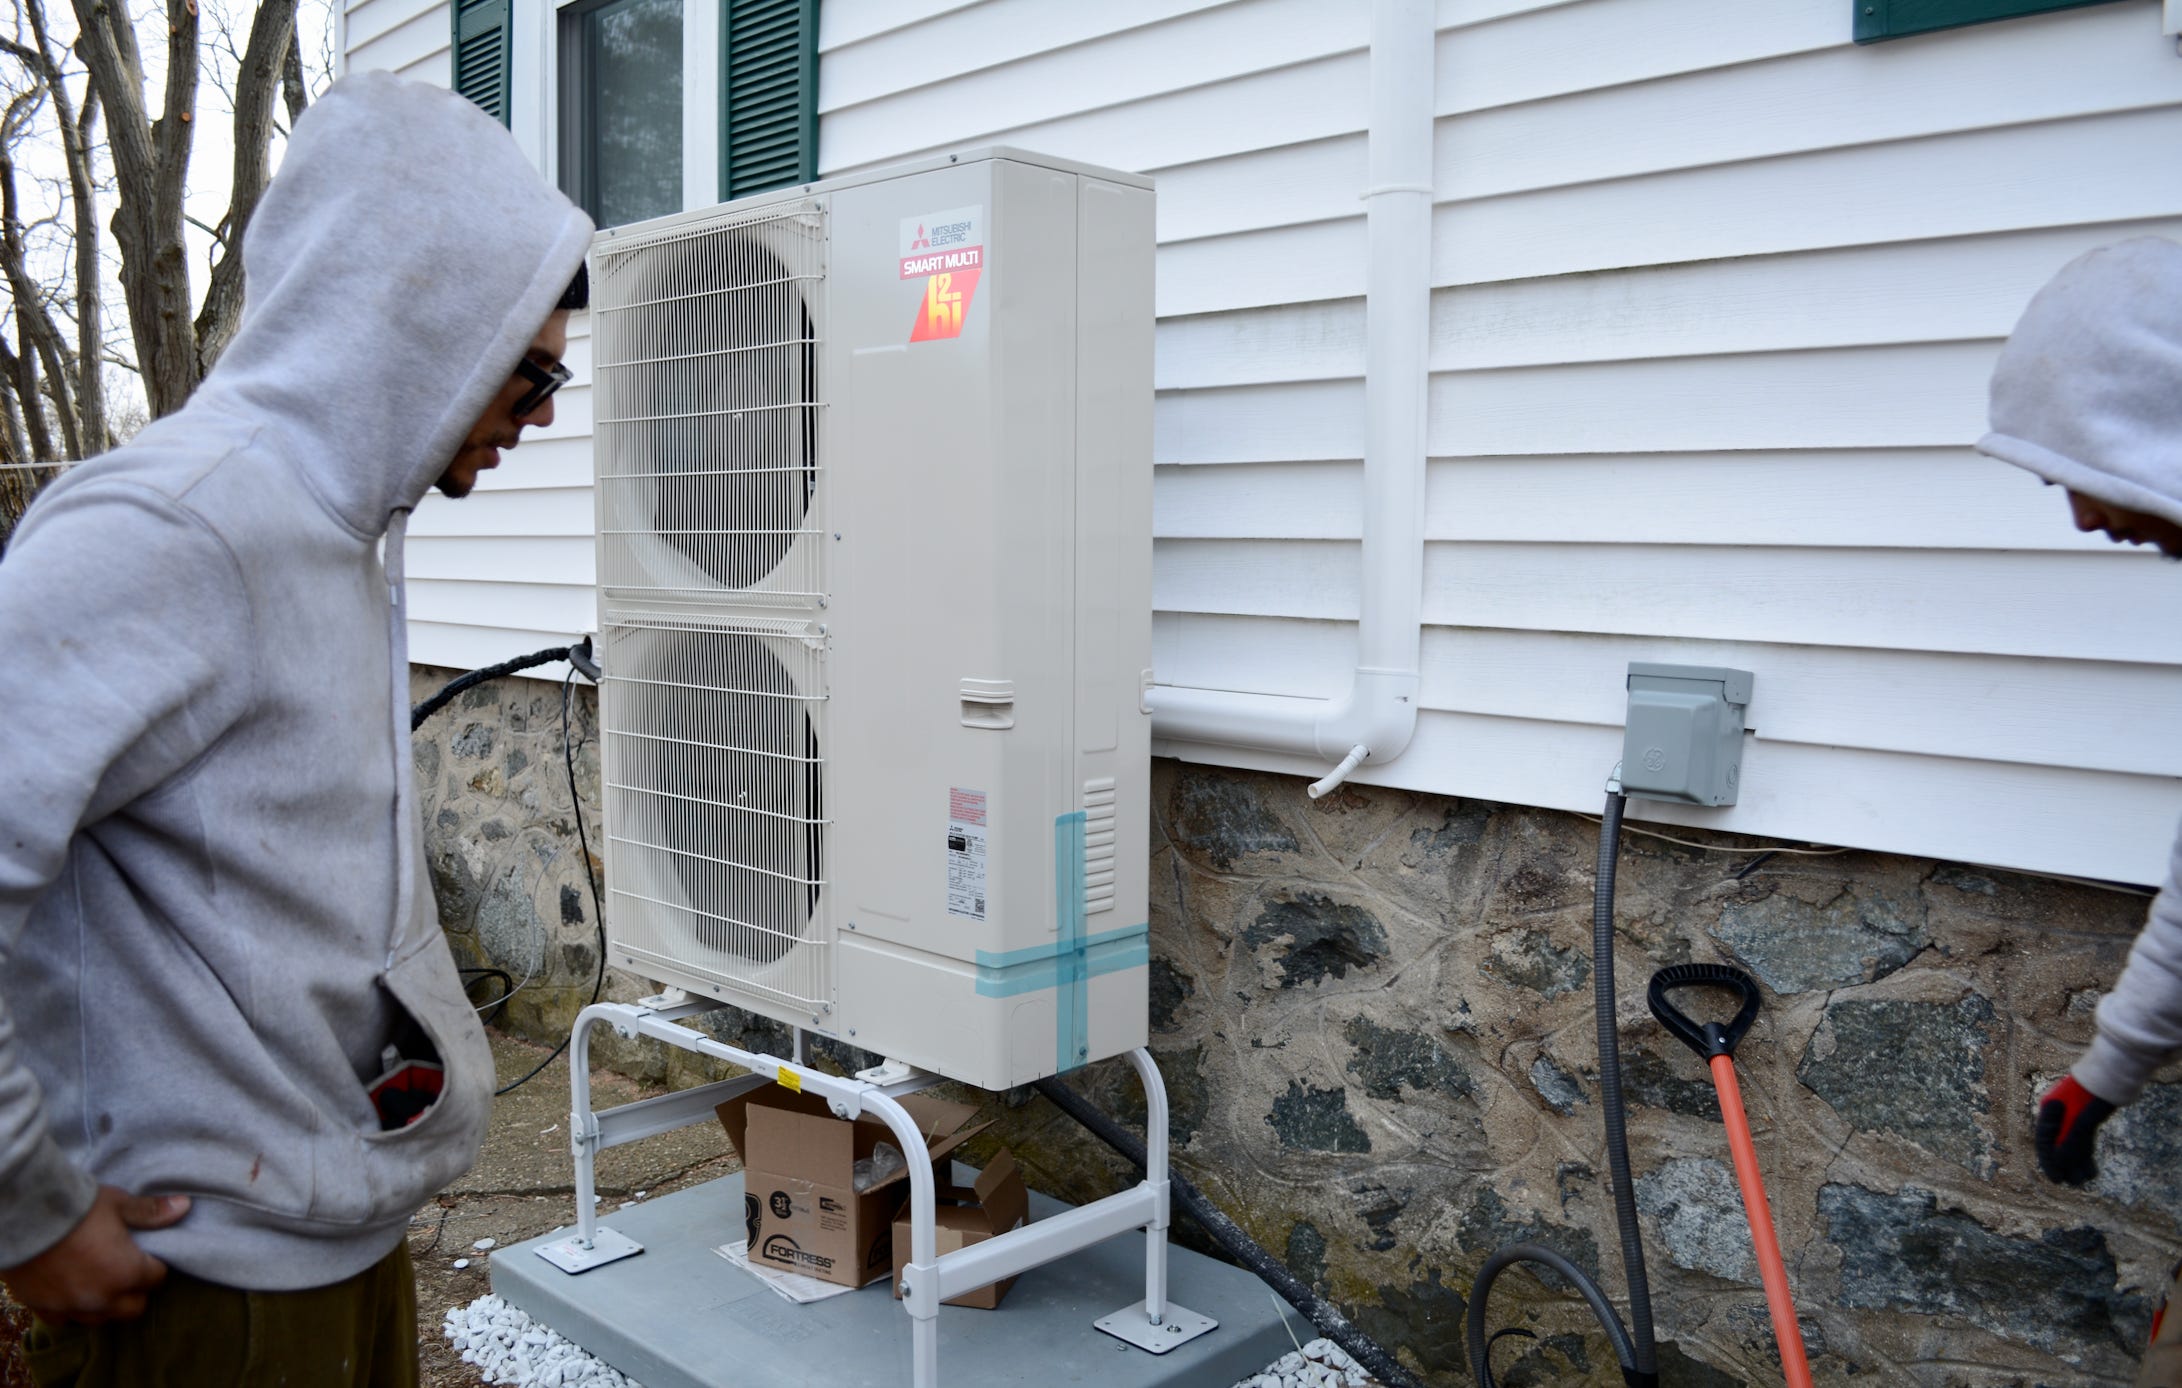
Mount condenser - condenser goes on pad, stand, and is level.

Electrical work - electrical team comes in & makes their way to the panel, and works on the circuit, disconnect, surge protector, grounding, etc.


Pressure decay + vacuum testing, charging refrigerant - now, the entire system is connected. Run a pressure decay test (ideally for at least an hour, if not half a day/overnight), fix the leaks (mandatory!!), then charge the refrigerant.

Commissioning & cleanup - turn on the system, and make sure every single subsystem works to satisfaction. Clean up the job site & leave it in good condition.


Do note that these steps don’t always have to take place exactly in this order3.
With a relatively small crew of 3:
The ductwork portion takes about 1.5 days to complete.
The mini-split portion takes 1 day to complete.
Running exterior lines & drilling holes take 1.5 day to complete.
Charging the outside unit & commissioning the system takes .5 day to complete.
You’ll want to budget another .5 day in case there are refrigerant leaks.
That’s ~5 days. Note: we wrote this in the spring, when the weather is nice. I’d add +1 day in the summer (when the attics are super hot), and -1 day if weather is perfect every single day.
Market Pricing and Cost Breakdown
4/3 update: expect price increases, due to tariffs.
There is a wide range of prices that you’ll find for a colonial SFH installation in the market. There are also significant seasonal price differences. Prices will also be different depending on whether you have existing ductwork or not.
Want to see the full cost breakdown, including the line-by-line consumables cost? I wrote an entire article for it. Check it out here:
Ductwork Cost Breakdown

This spring, we’ve spent a lot of time thinking about ductwork. There’s a lot of cost variation when it comes to ducted systems, and it’s been a black box for us.
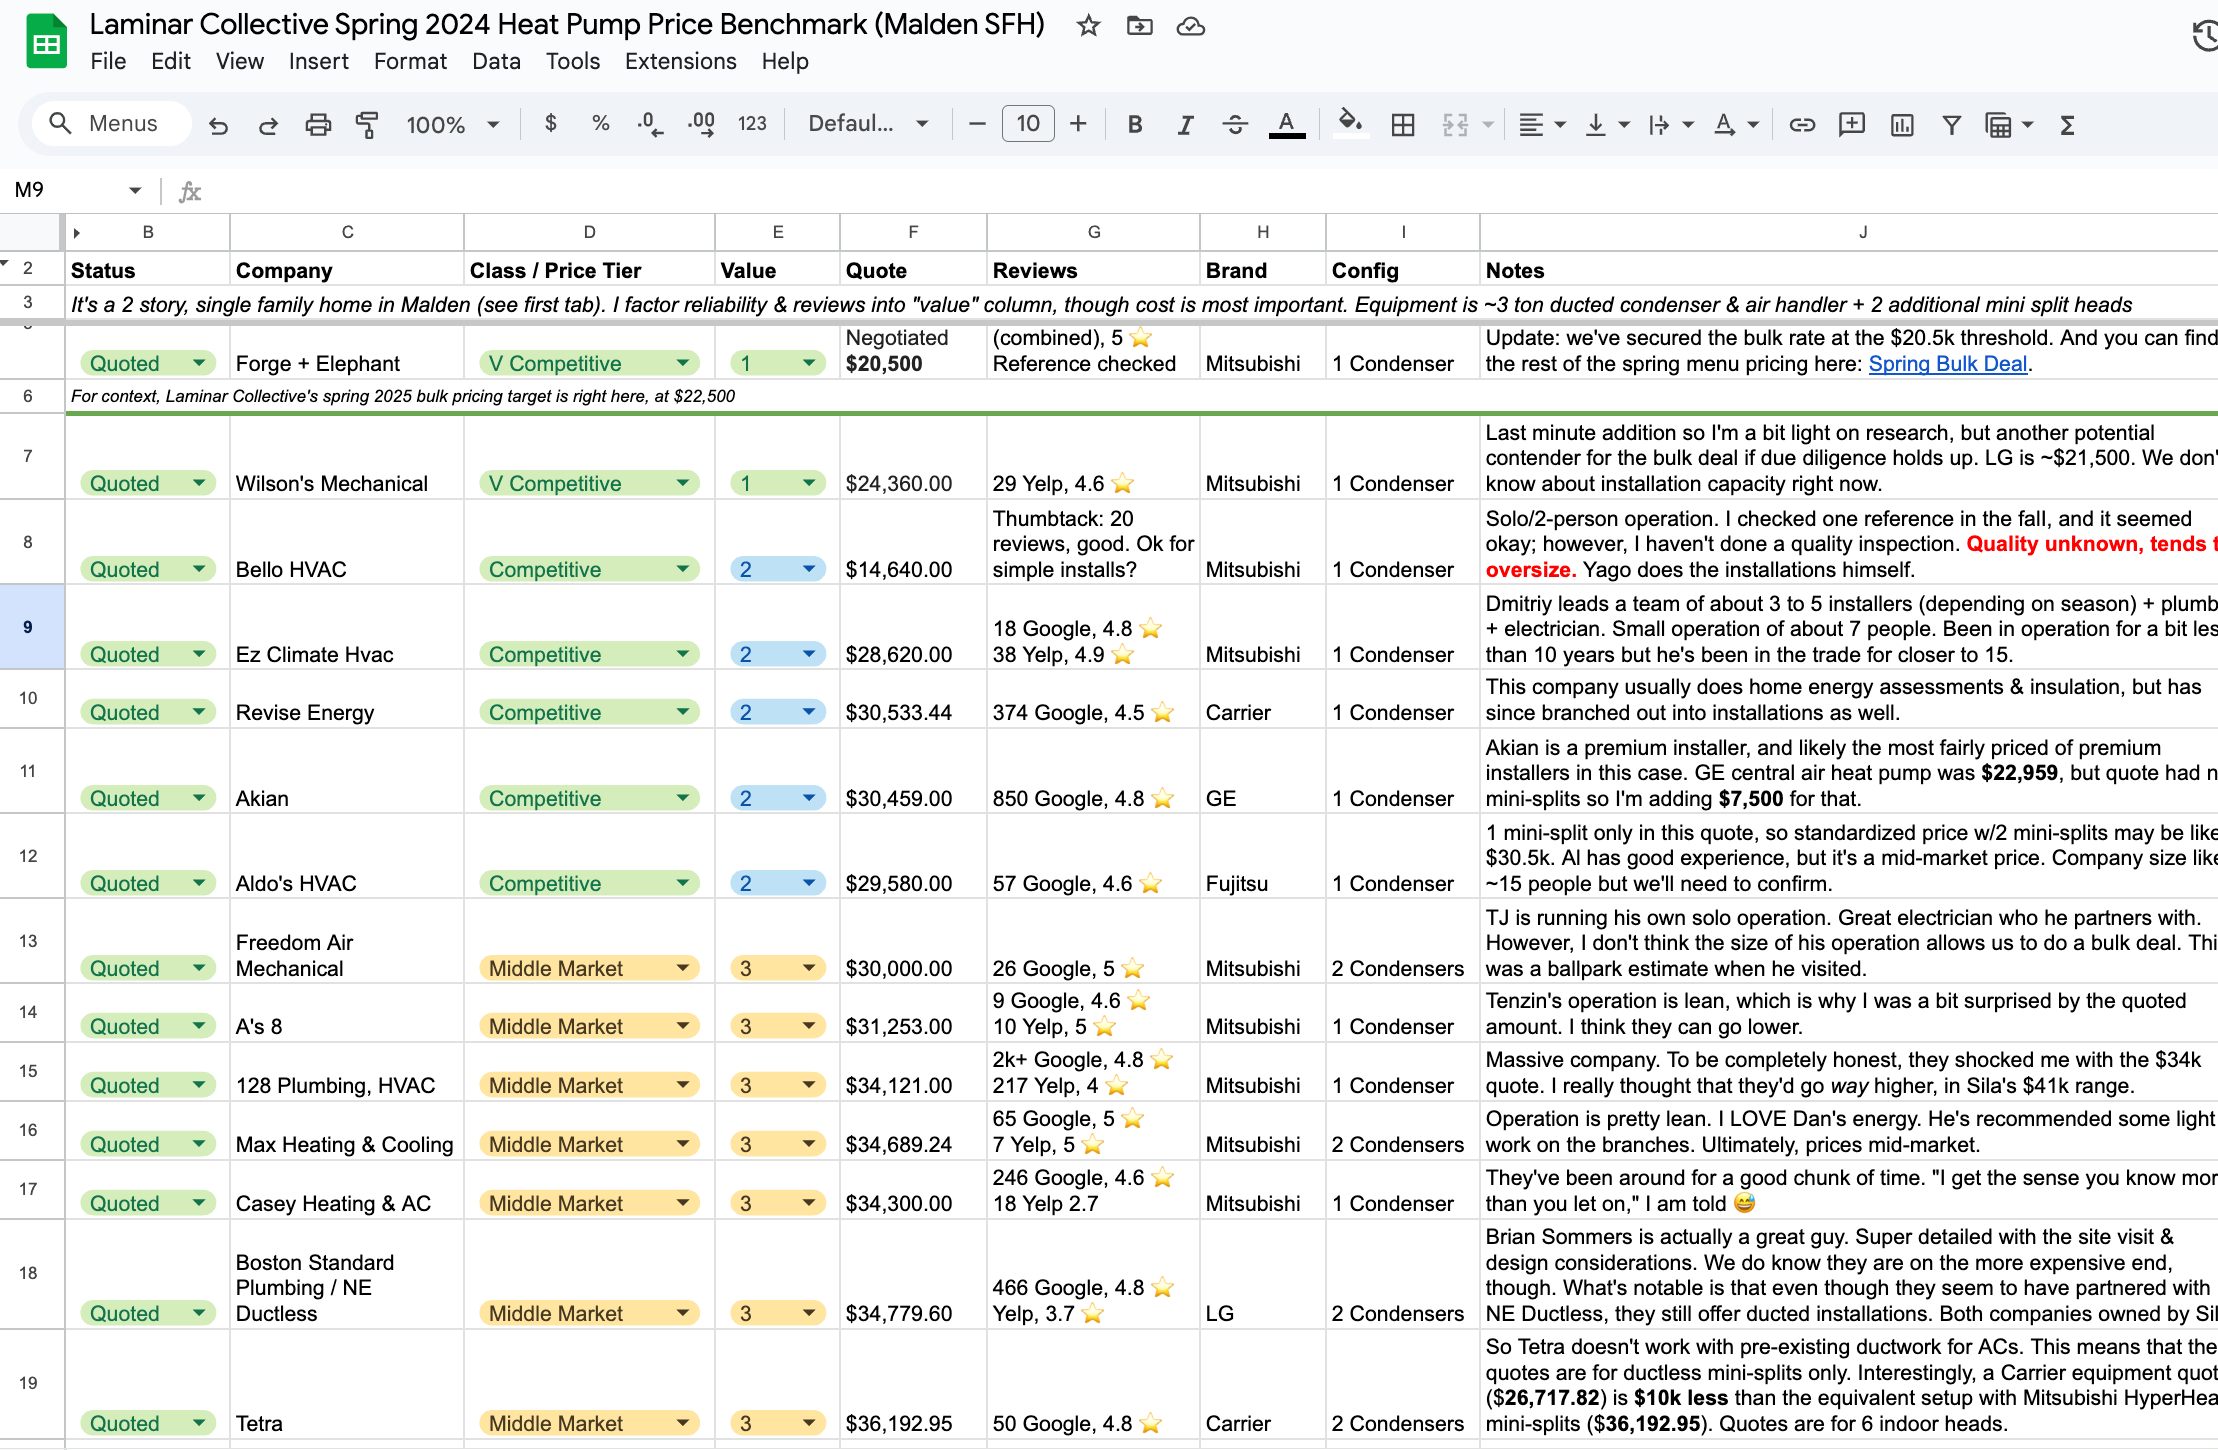
What is a Realistic Fair Price?
This is a good baseline price (e.g. during shoulder seasons, not busy summer season4) for a mixed system with 1 air handler in the attic, and 2 mini-splits on the 1st floor:
The theoretical minimum for this installation (with Mitsubishi), if you are an experienced HVAC + electrical tech who can DIY this, is ~$16,500.
If you pay market-rate labor for a good HVAC friend, you’re at $23,000. Again, zero overhead (or service guarantees, or permit & inspection time, etc.)
An indie contractor with really low overhead can probably do ~$28,500, but you’ll have a hard time finding them because they spend no money on marketing5
A medium-sized, local contractor6 may price around $31,000 to $36,0007
Huge HVAC contractors (e.g. Sila, 128) would probably charge $37,000+ & beyond
#1 and #2 don’t exist for 99% of people, so as a typical consumer, you’re probably dealing with #3, #4, and #5. Unfortunately, unless you spend all your waking hours thinking about the economics & quality of contracting work like we do, you may not be able to find #3 (or feel comfortable vetting them by yourself).
So, for most consumers, you’re dealing with medium-sized contractors & up.
Opportunities for Cost Reduction
Use another brand that isn’t Mitsubishi (totally fine for <2,000 sq ft homes)
Avoid the summer!
Bulk buying equipment.. that said, the problem is that entities that are large enough to do bulk buying (e.g. big contractors) typically have enough pricing power to never pass those savings onto consumers. Laminar Collective, in this sense, is acting like a co-op, but that’s not a super scalable model.
Rebates
Given that most single family colonial homes will require
Multiple ports
>25,000 BTU in heating capacity (unless your house is like, <1,500 sq ft)
You’ll probably end up with at least a 3-ton condenser. So this is pretty similar to what I wrote in the triple decker guide.

Mass Save offers a $3,000/ton rebate per unit, maxing out at $10,000. Considering the rated capacity of each model, you’d likely receive anywhere between 2.5 x $3,000 = $7,500 to 3 x $3,000 = $9,000 in rebates.
Conclusion
There are 3 important takeaways here:
System design & equipment selection is fairly straightforward for a single family colonial home, but sizing matters. Make sure you get a Manual J heat load calc.
Installation is actually fairly labor intensive, and consumables & equipment make up about ~$16,000 (!!) if you’re using Mitsubishi.
Pricing will likely be ~$30,000+, all things considered, unless you forgo Mitsubishi, join an LC bulk deal, or go with an indie contractor. It goes up from there, since bigger houses may require more consumables.
I’m not gonna lie. When I first started Laminar Collective, I was like
Holy smokes, are people getting ripped off? Installing a heat pump can’t possibly be this expensive!!
In some cases, I think that’s still true. Please don’t pay $50k for a Sila installation; your money is going to ads and Morgan Stanley.
But $30k? Honestly, I get it. We’ll be exploring opportunities to chip away at this number for the rest of the year, but with tariffs and all that - I expect that prices will remain at this level for the foreseeable future.
Except for the summer, when it’s real hot up there in the attic!
~2,000 sq ft.
For example, you can do the ductless part first, then the ducted. Or the other way around. But you can’t like, do a pressure decay test until all the lines have been connected.
2 sample adjustments:
Installing in a summer emergency? Add 5 to 10%.
How about only 2 mini-splits, not 3? Subtract ~$2,500 to each of these prices.
It’s all word of mouth!
Or a contractor subsidizing their margins with VC funding in a bid for growth, like Elephant (& some other contractors that take external PE funding)
Part of this range is their comfort with ductwork. IF they’re really confident, they may say “okay, no need for a bunch of uncertainty margin - I know I can do this for $32,000”. Otherwise, they may say “in case anything goes wrong, I’m going to tack on an extra $2,000 for uncertainty”.
Compared to the indie contractor, they will have a box truck (instead of a pickup), service warranties, admin staff, etc. They also may have a warehouse!